Learn how to seamlessly set up Keragon webhook integration in Twilio. Follow the detailed instructions below to configure the webhook efficiently.
Go to app.keragon.com
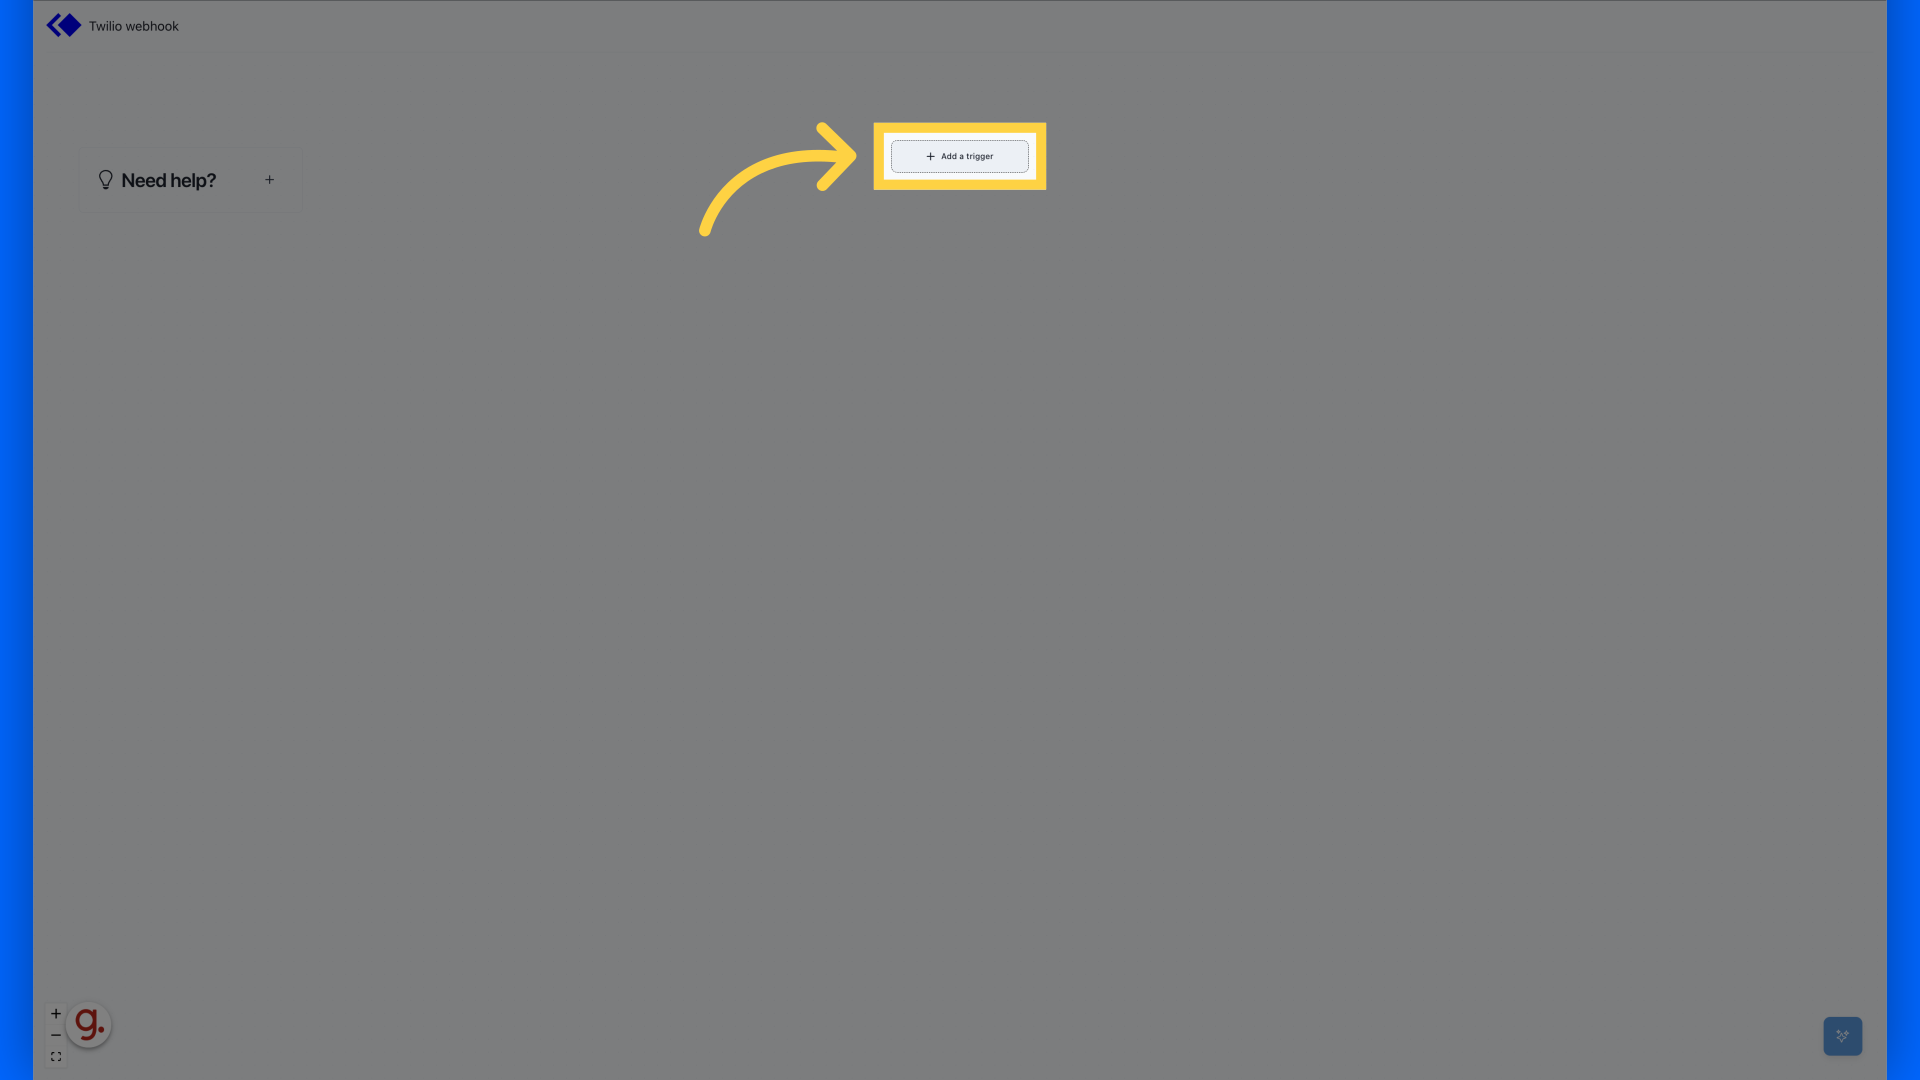
1. Click "Add a trigger"
Click on "Add a trigger"
2. Click "Twilio"
Navigate to "Twilio"
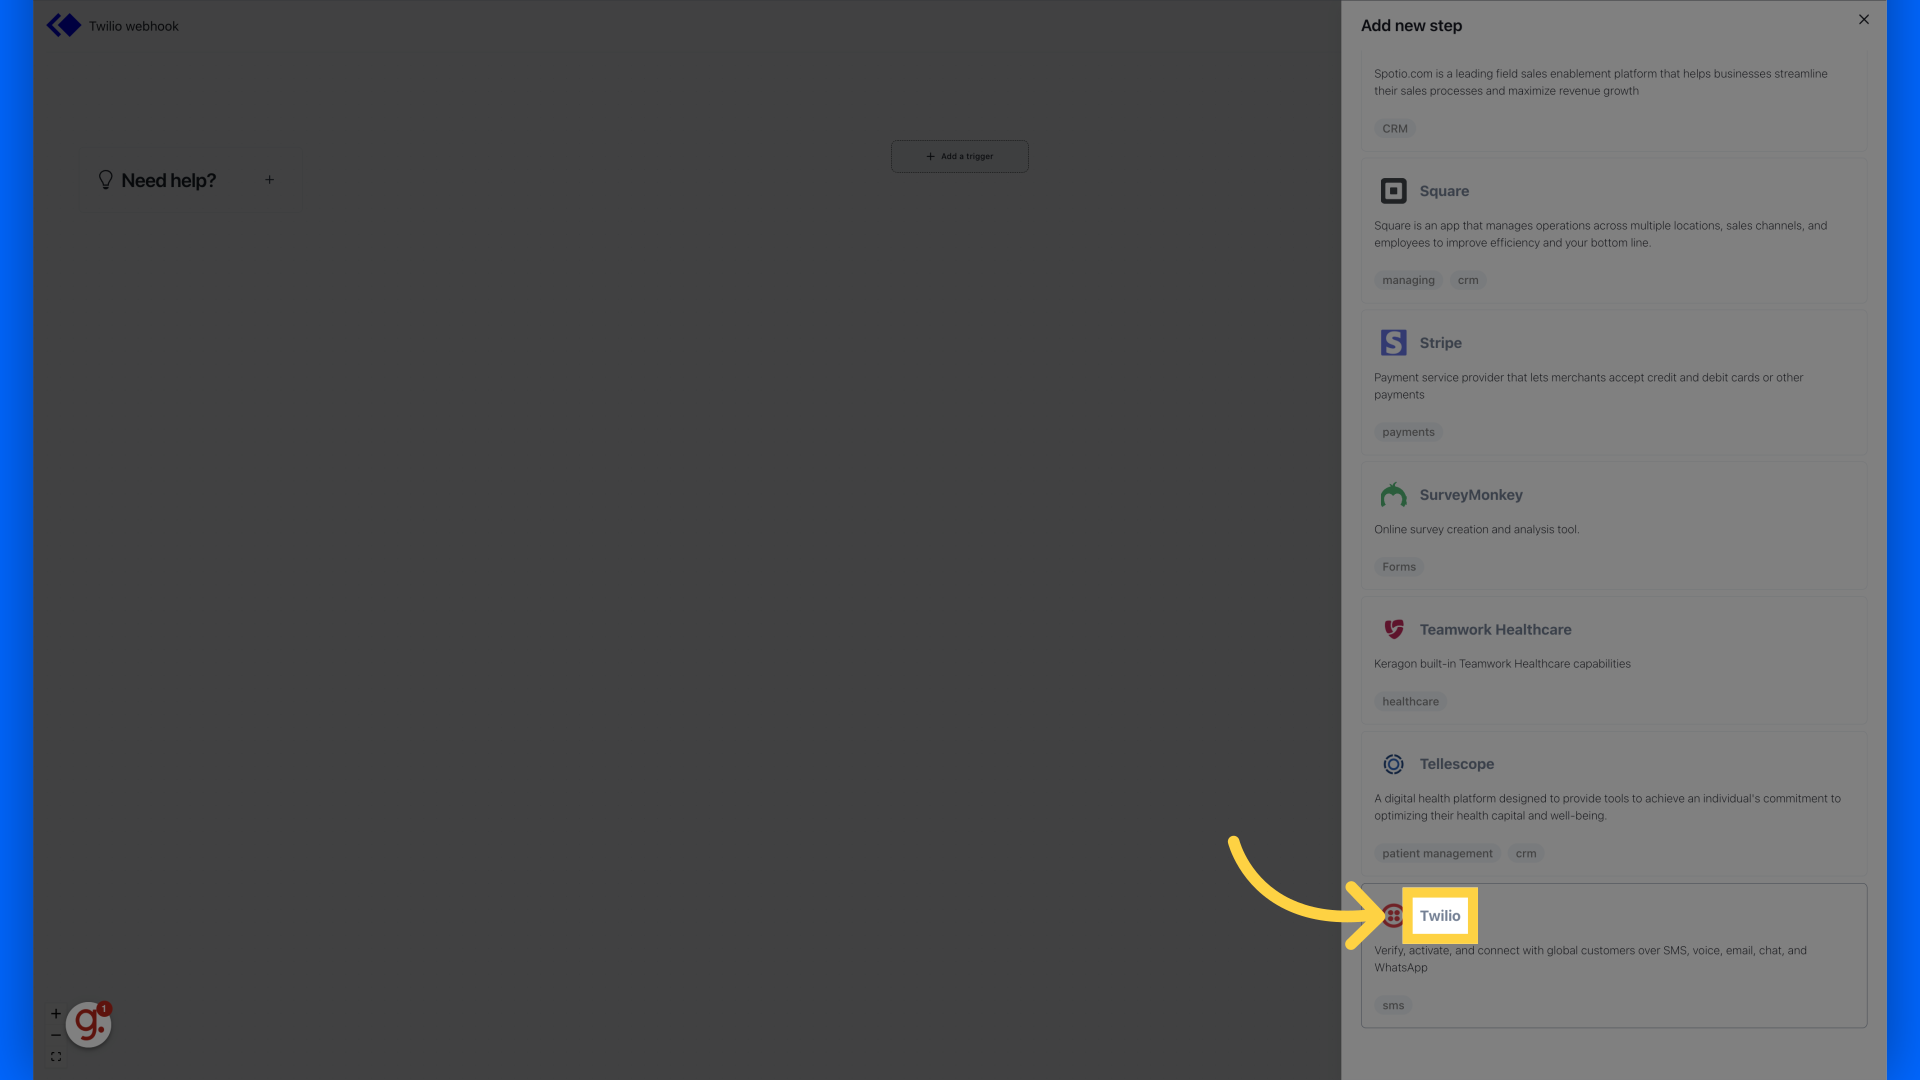
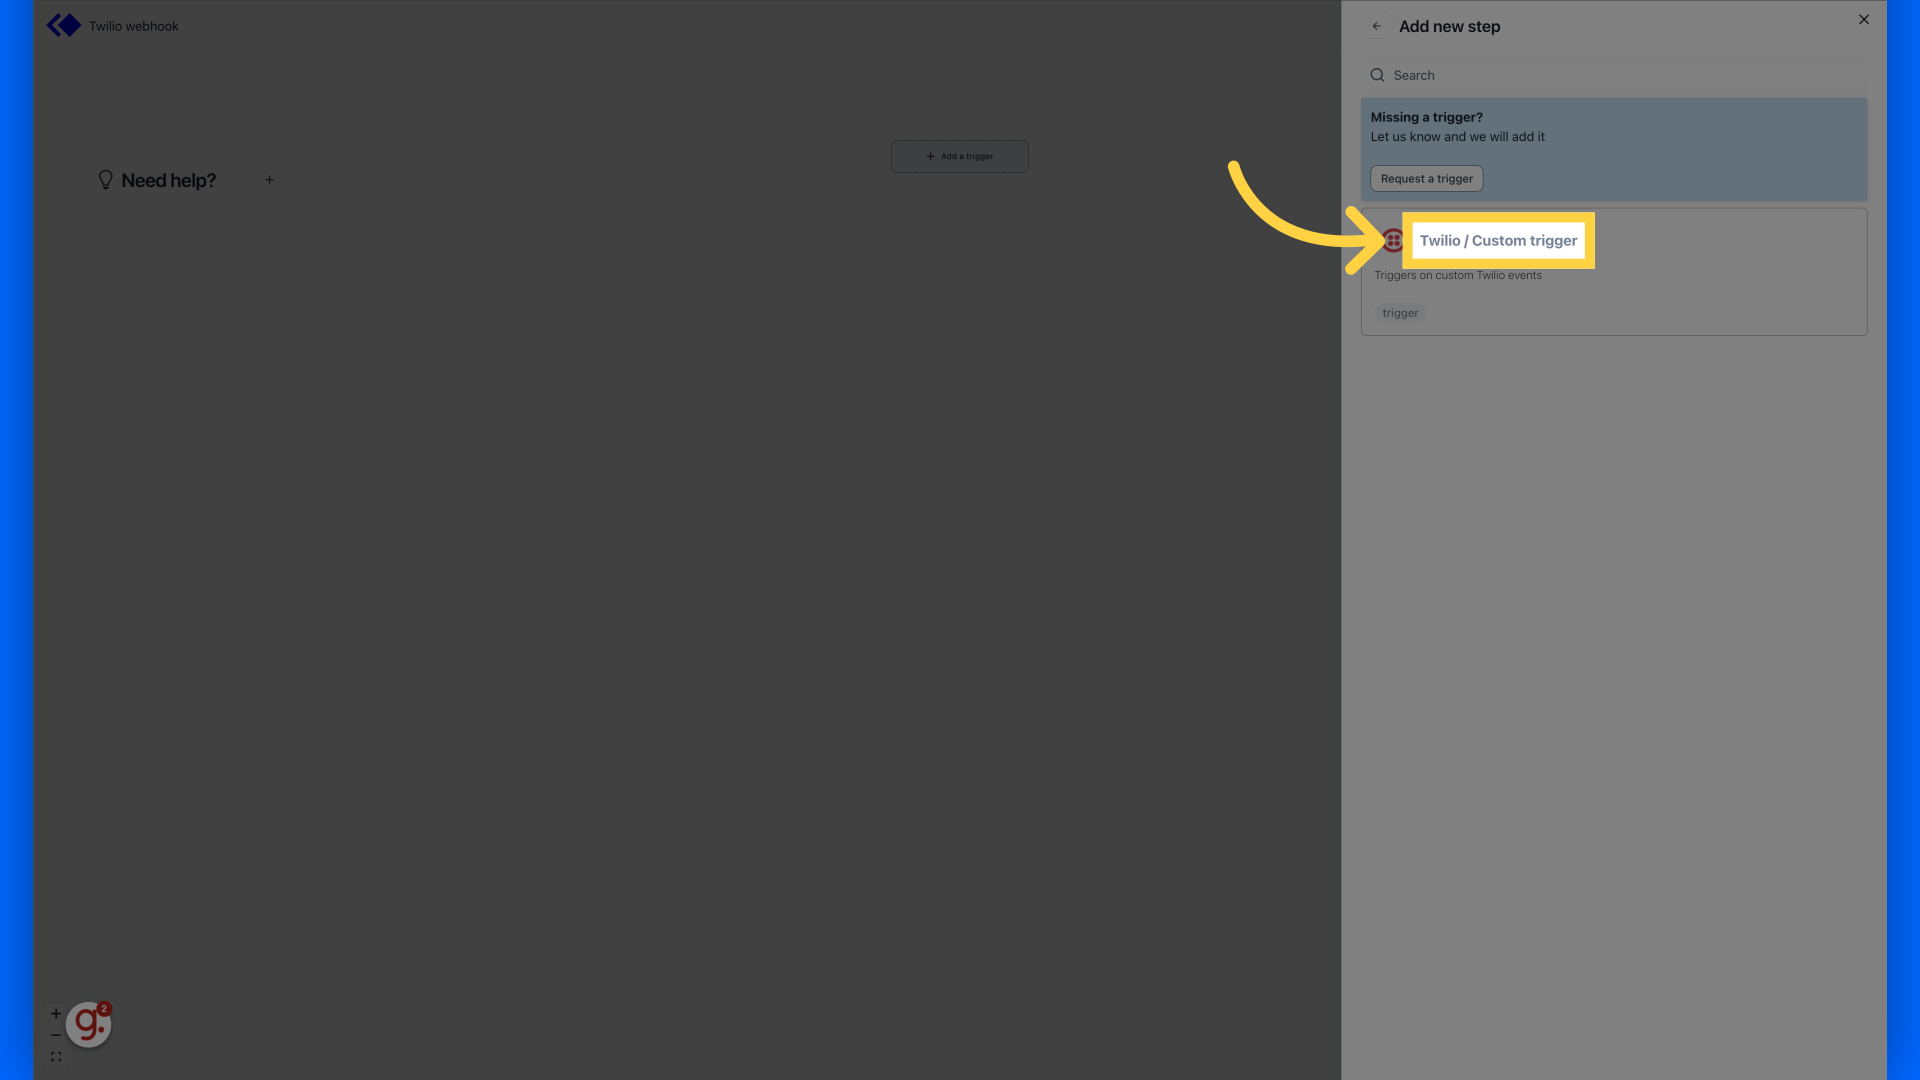
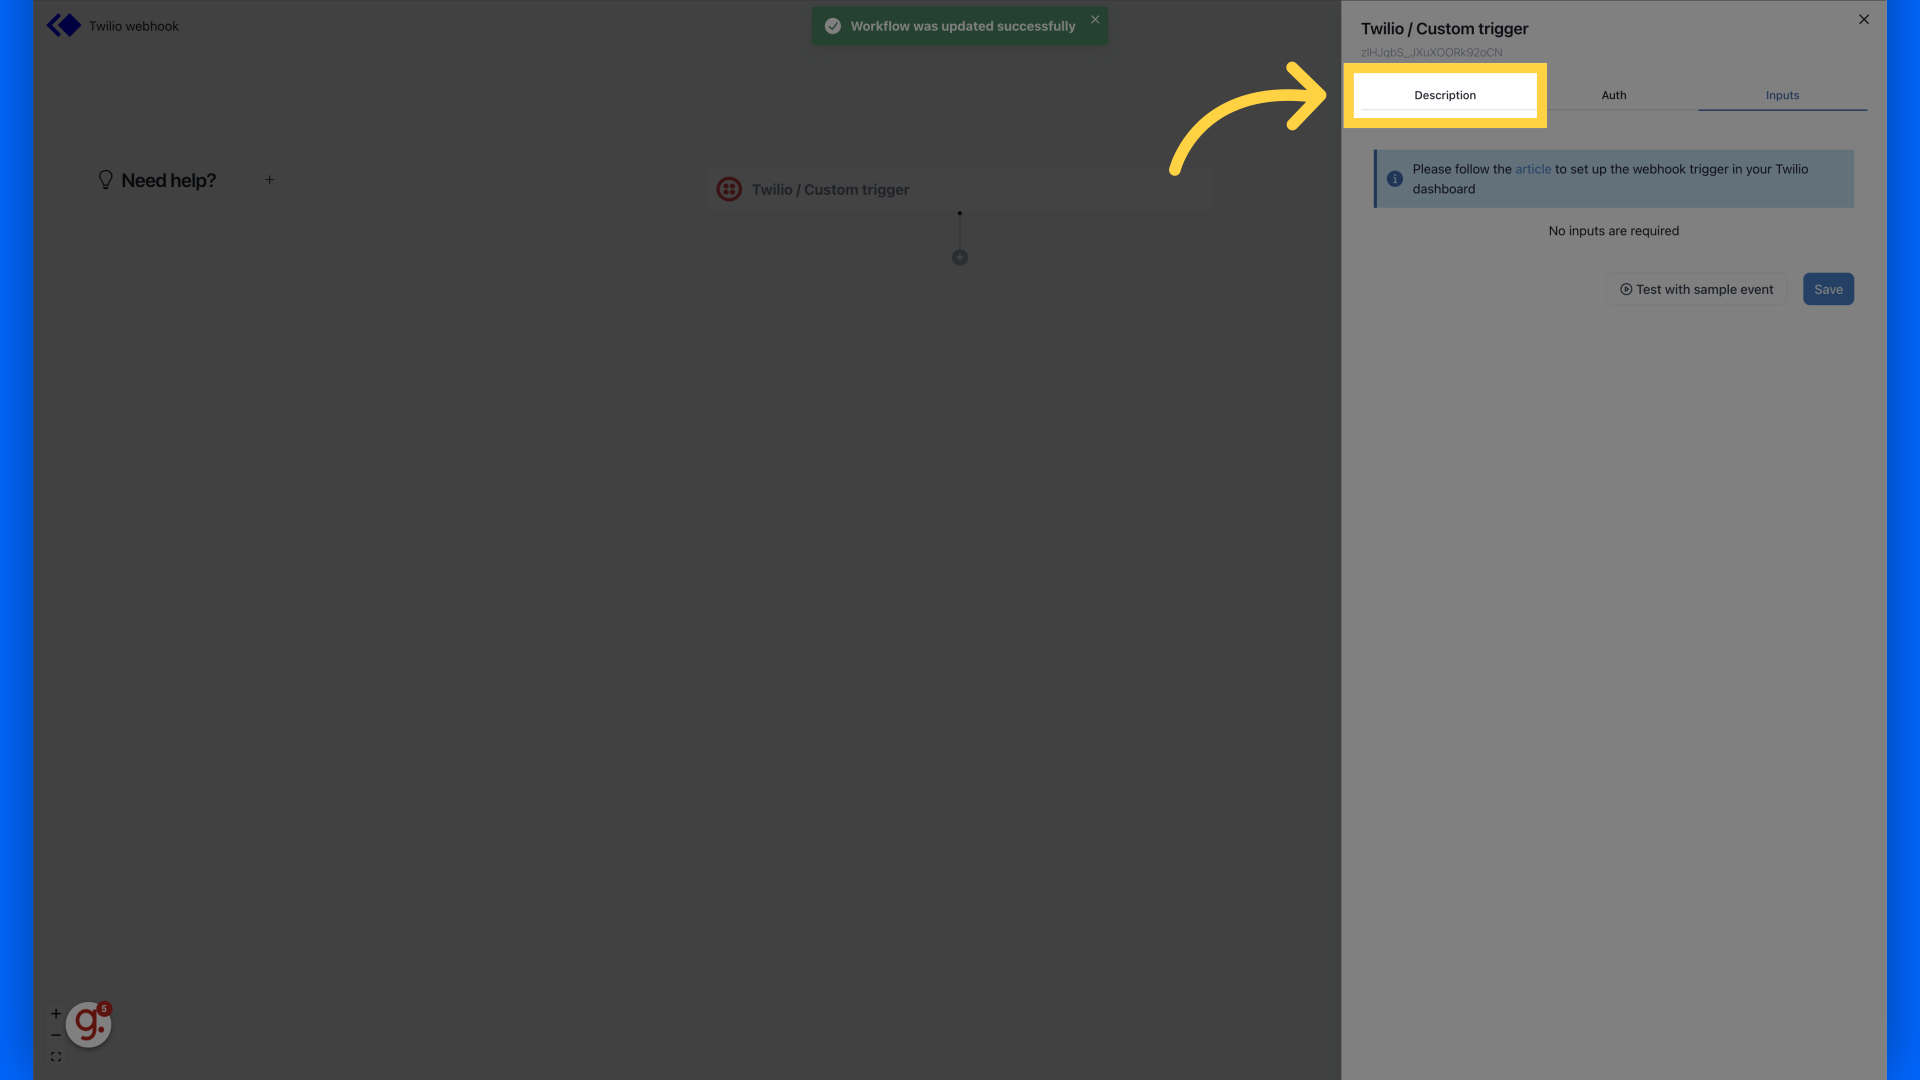
3. Click "Twilio / Custom trigger"
Select the "Twilio / Custom trigger" option
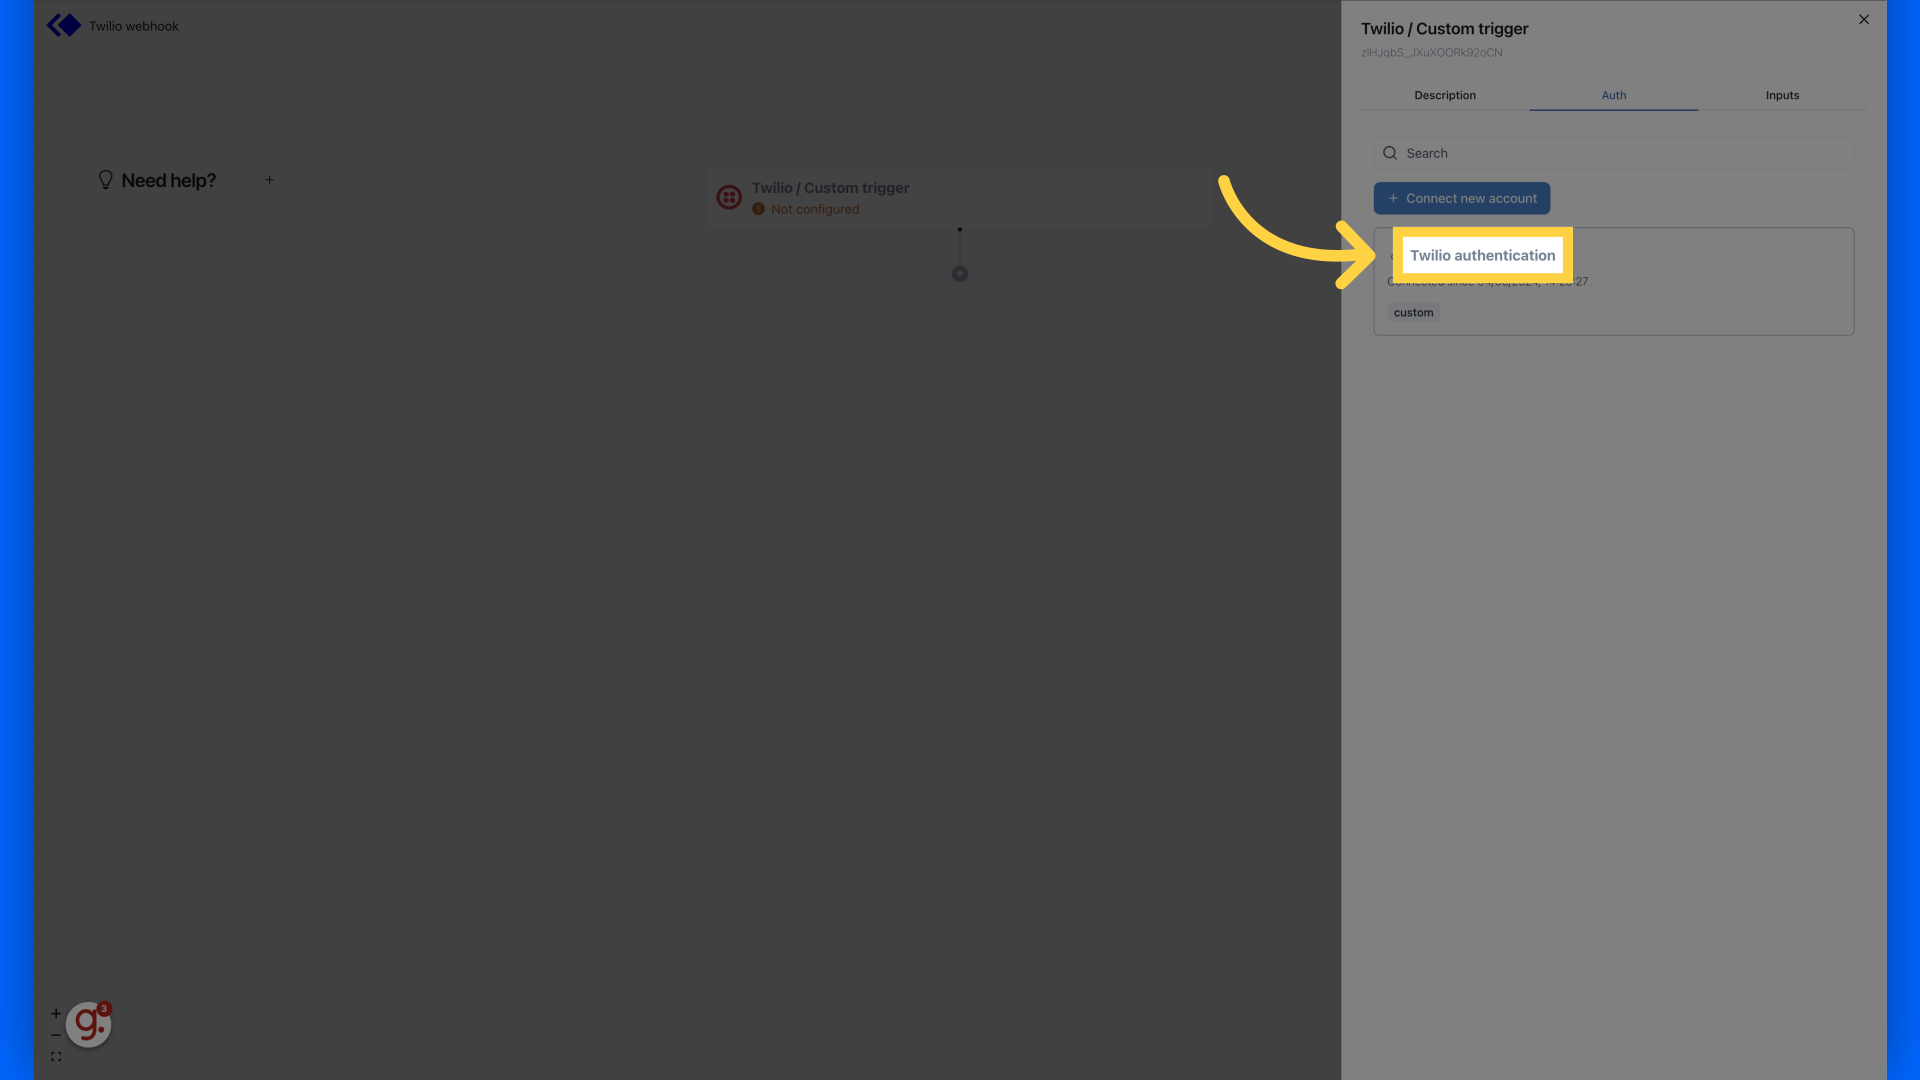
4. Choose your Twilio authentication
Choose your Twilio authentication
5. Click "Save"
Save the changes made.

6. Click "Description"
View the description.
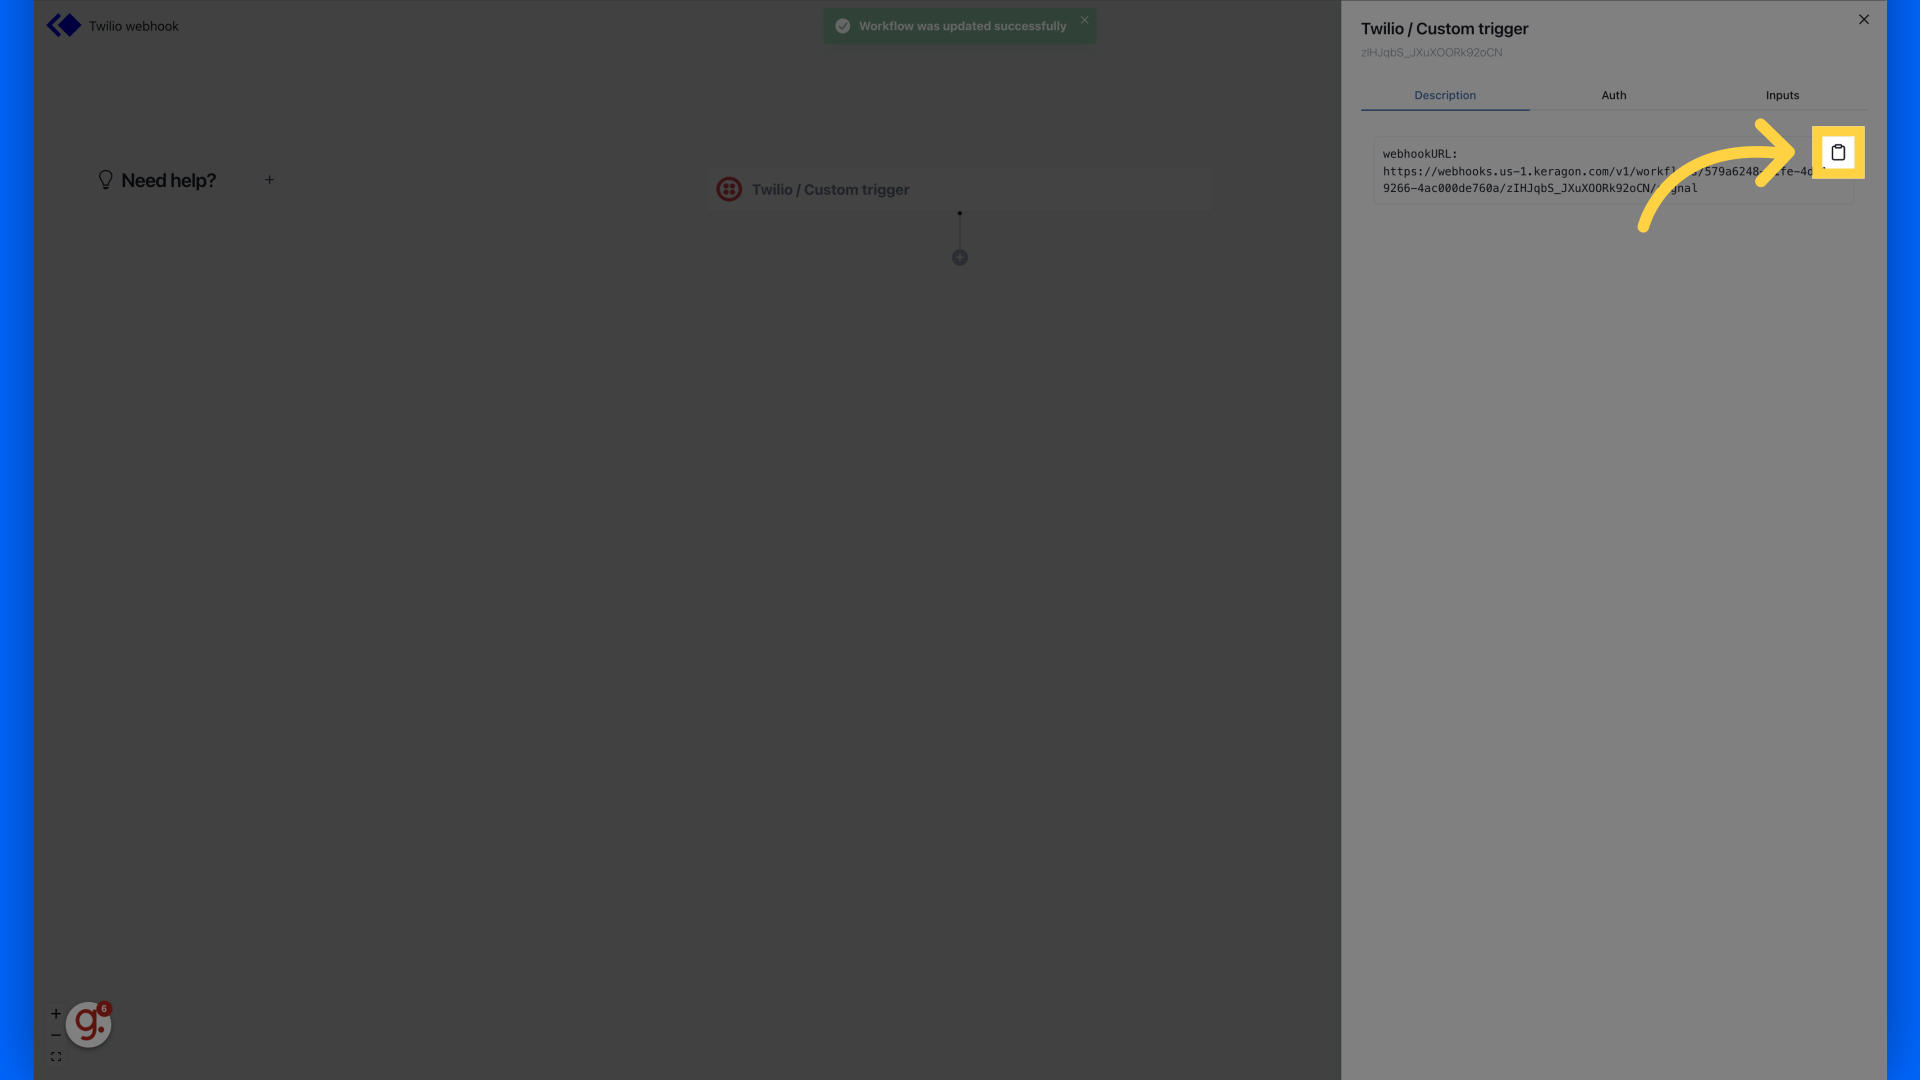
7. Click here
Click copy button on "webhookURL"
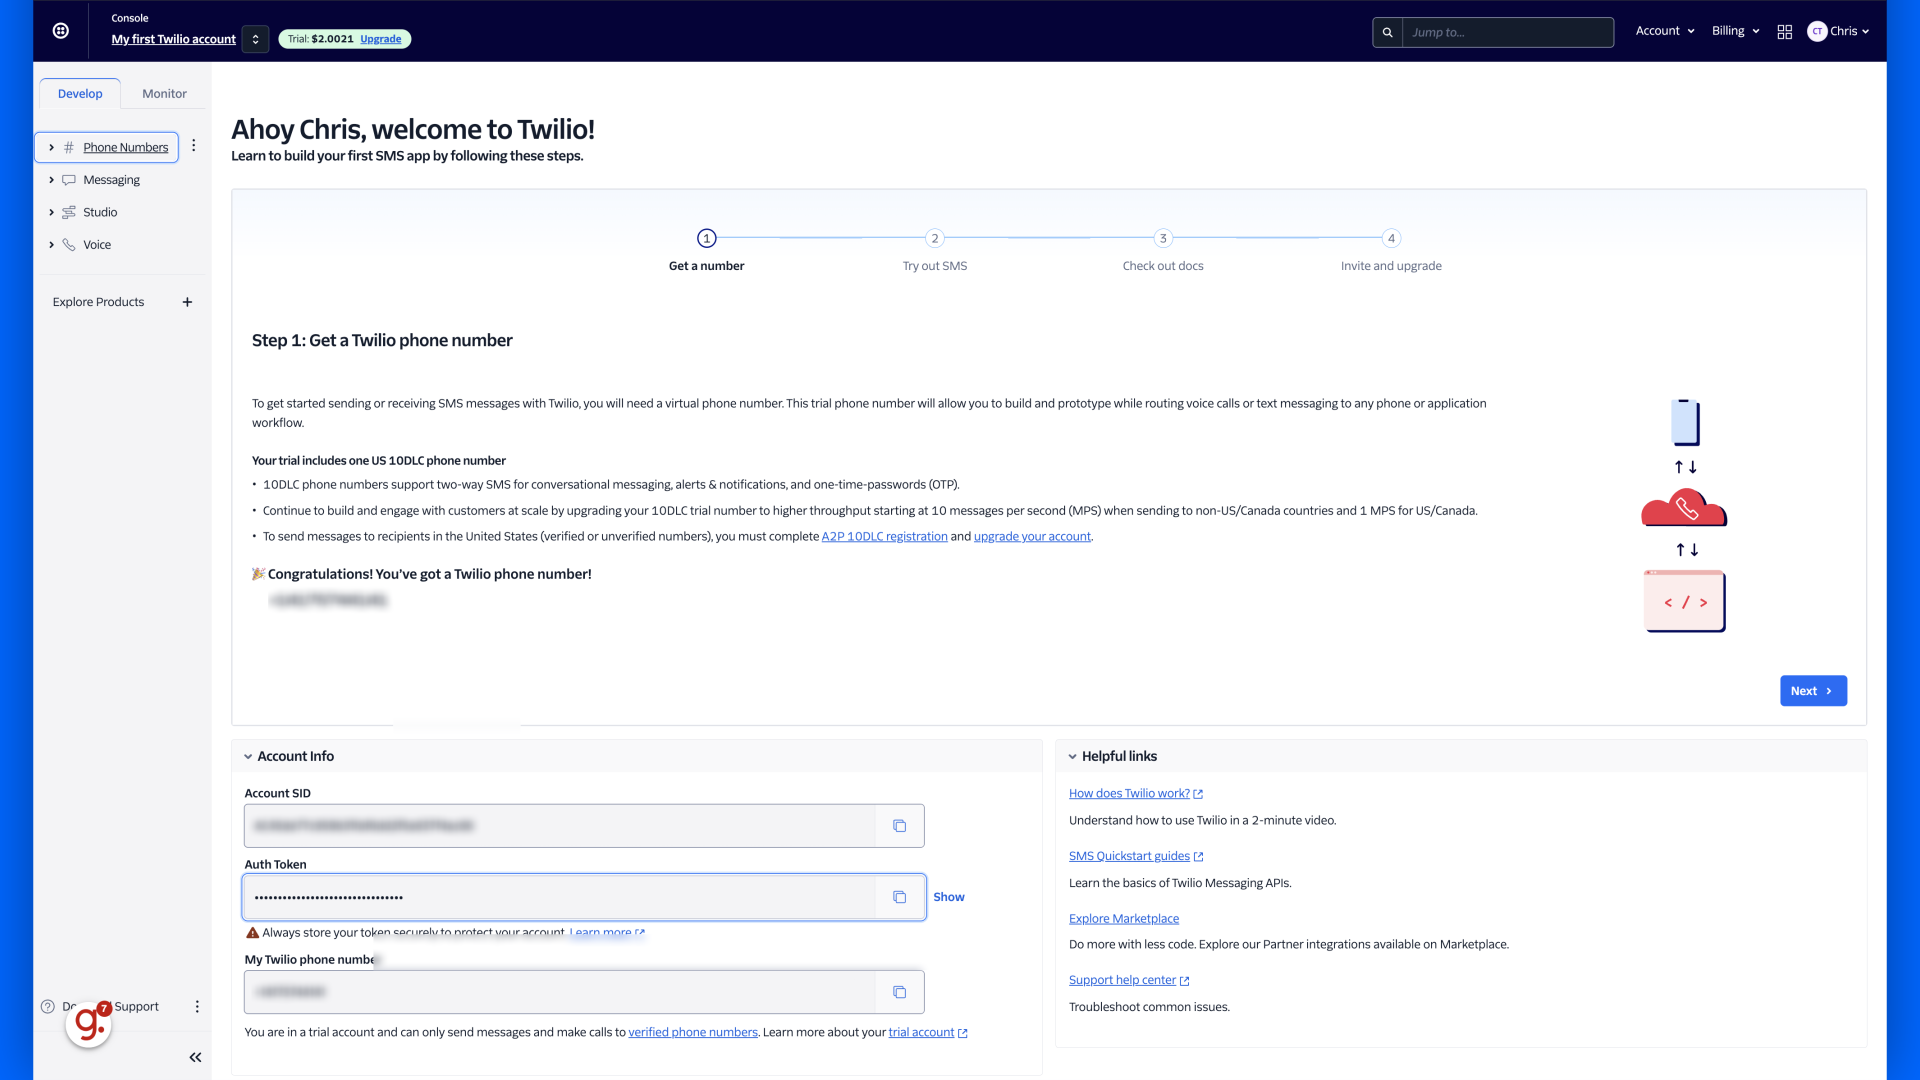
8. Switch to "console.twilio.com"
Switch to "console.twilio.com"
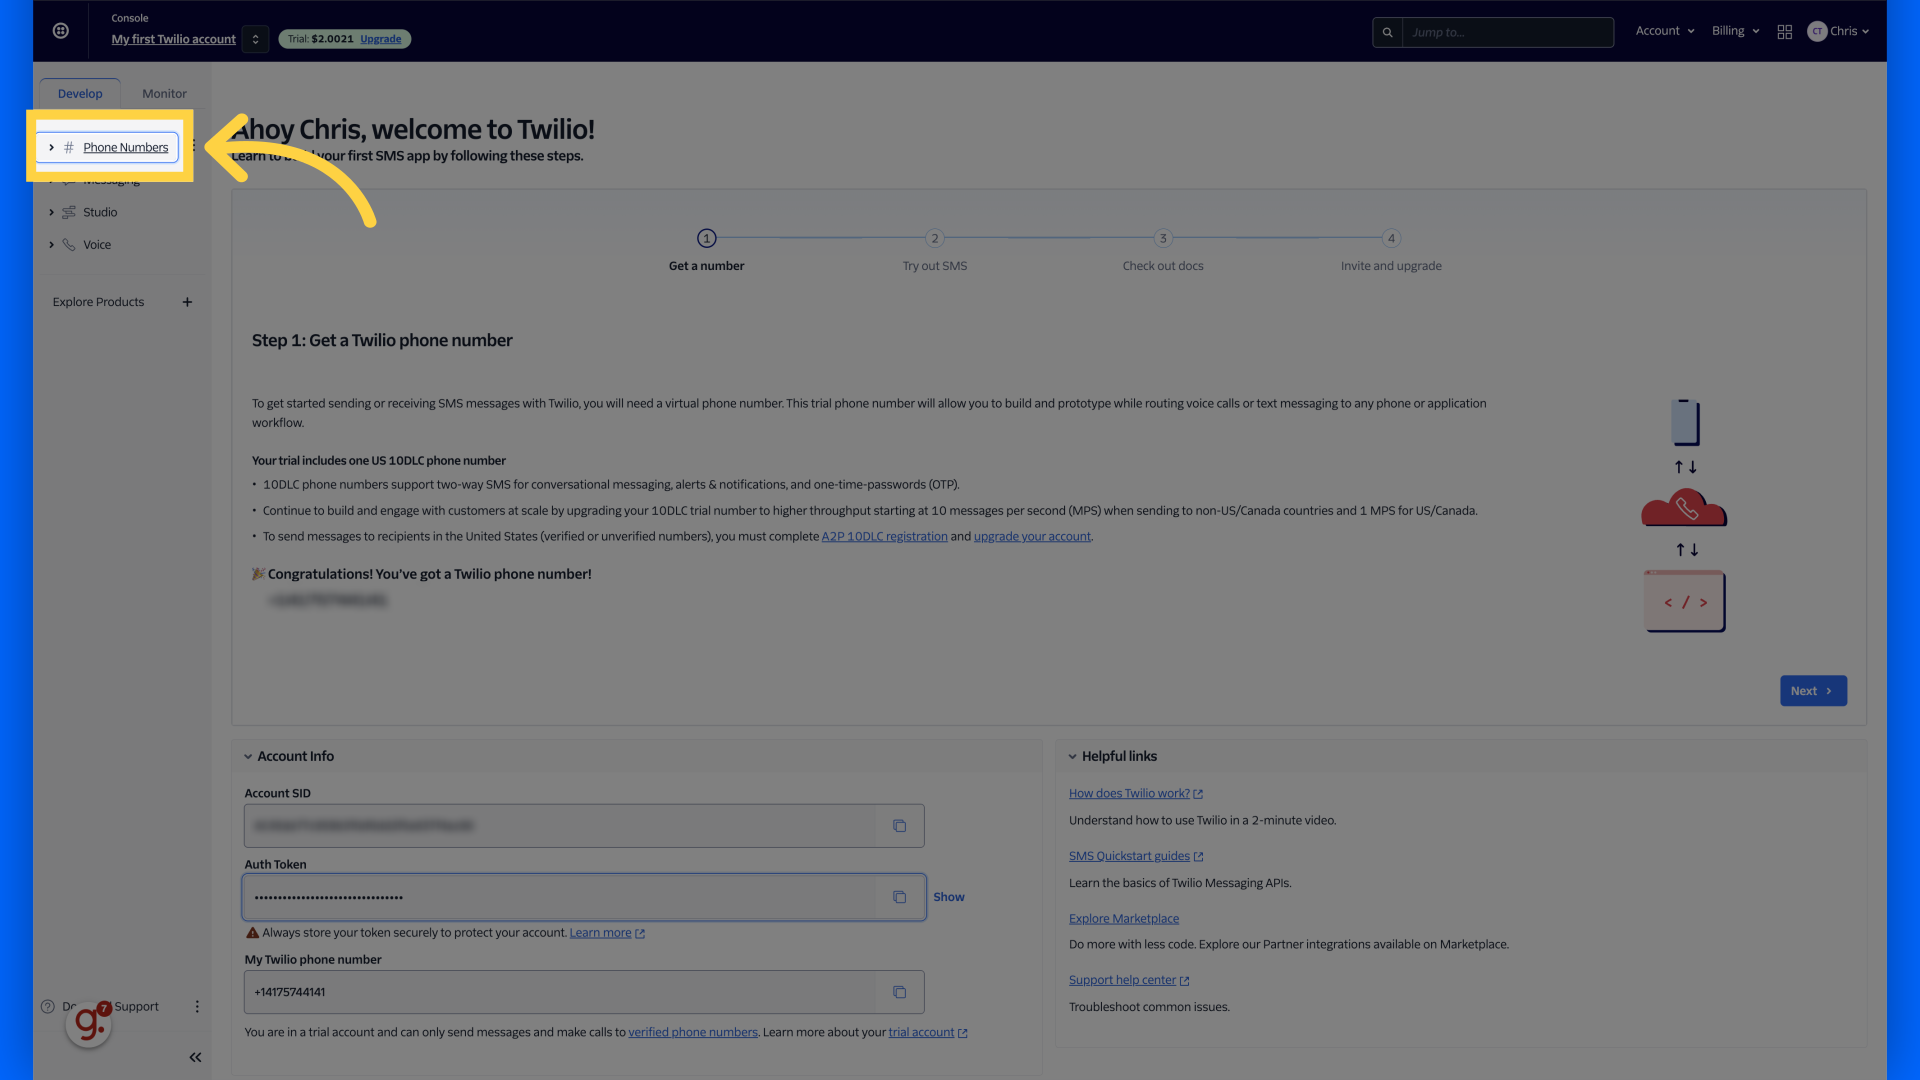
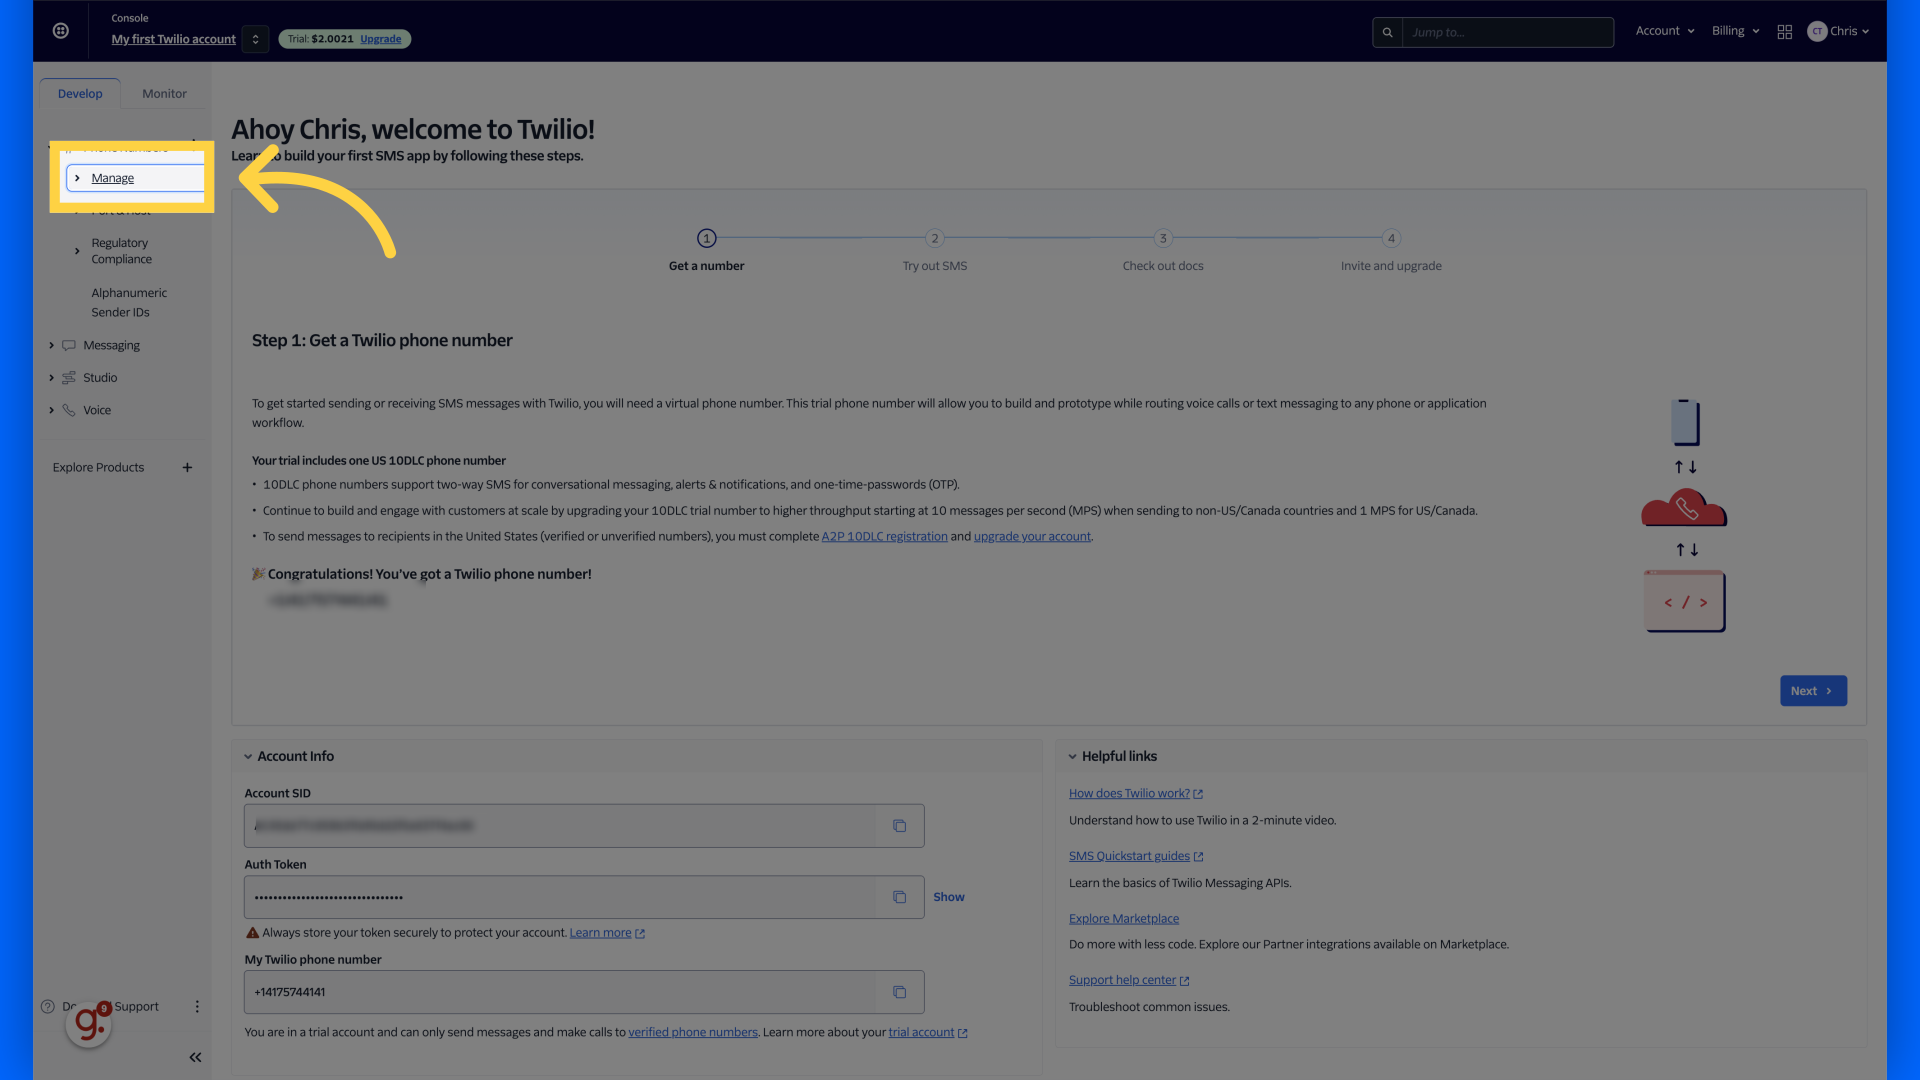
9. Open "Phone Numbers"
Open "Phone Numbers"
10. Open "Manage"
Open "Manage"
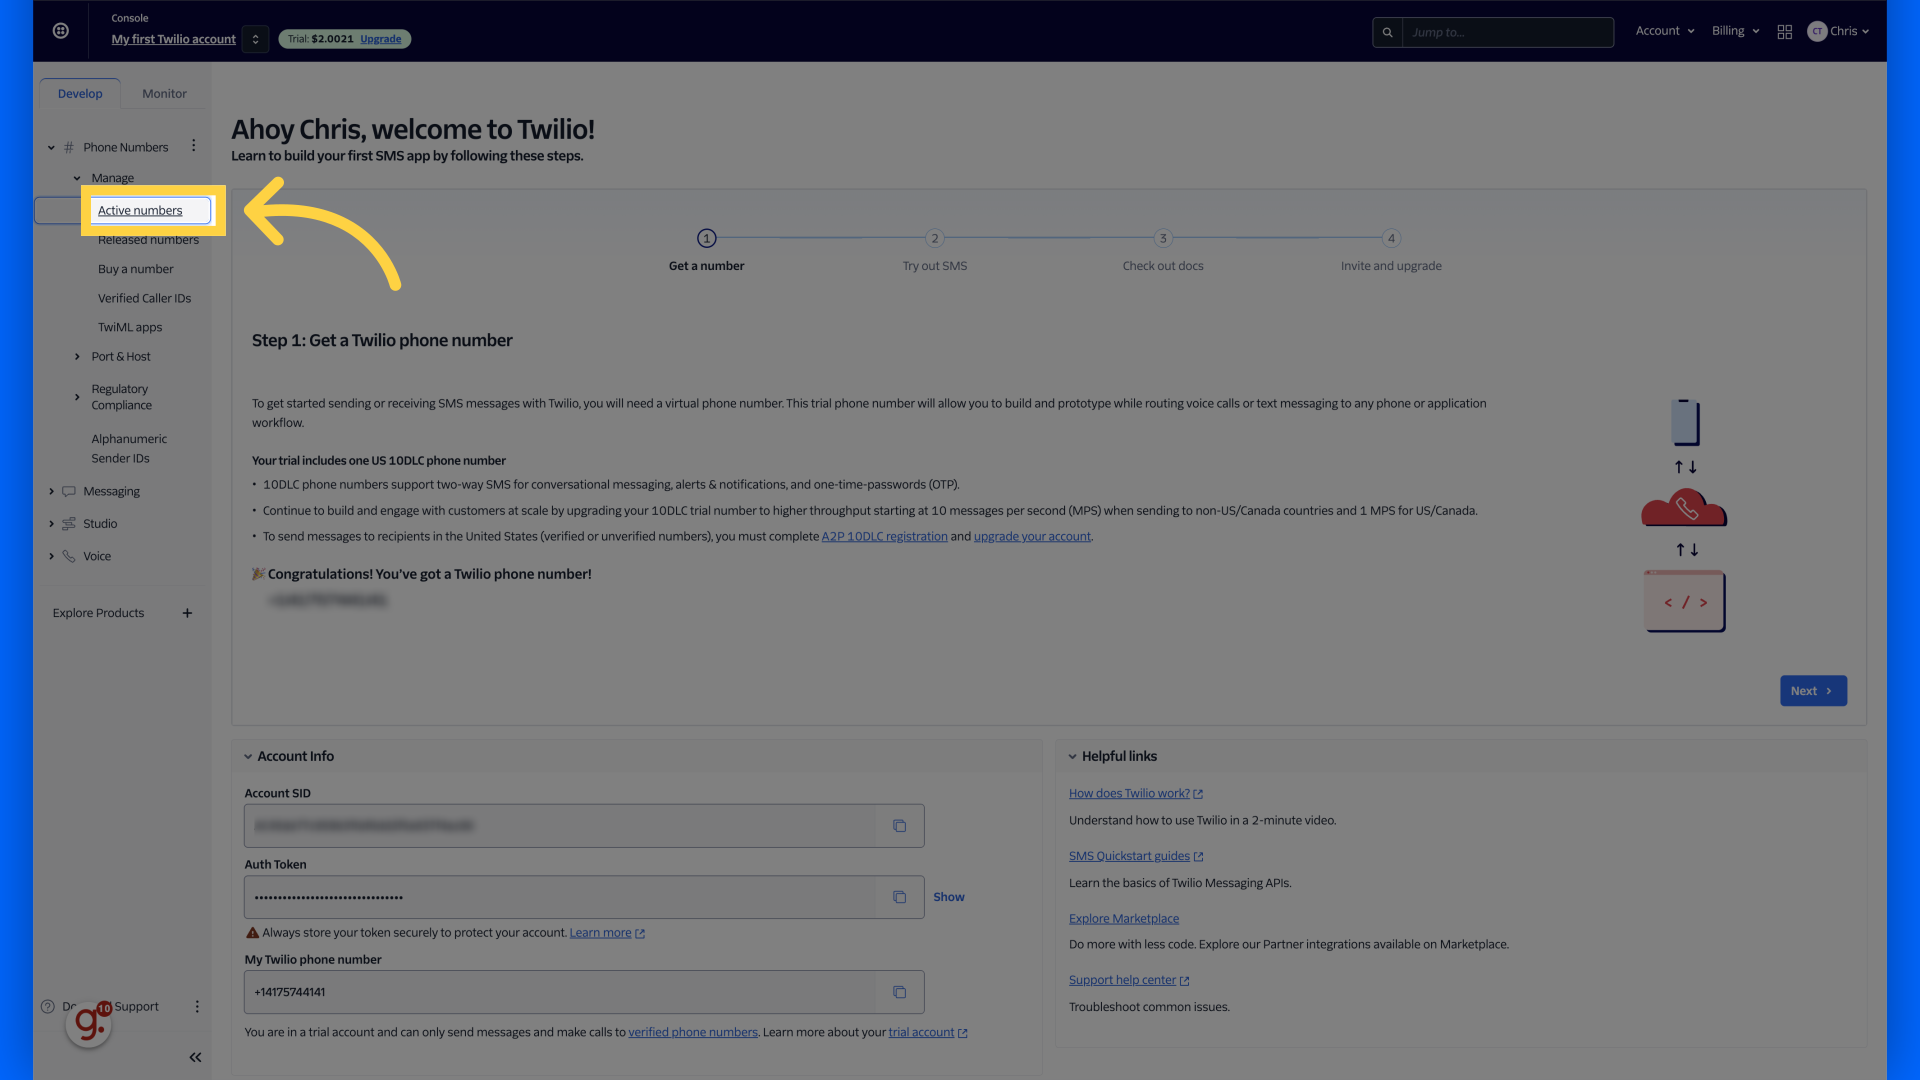
11. Click "Active numbers"
Navigate to the "Active numbers" section
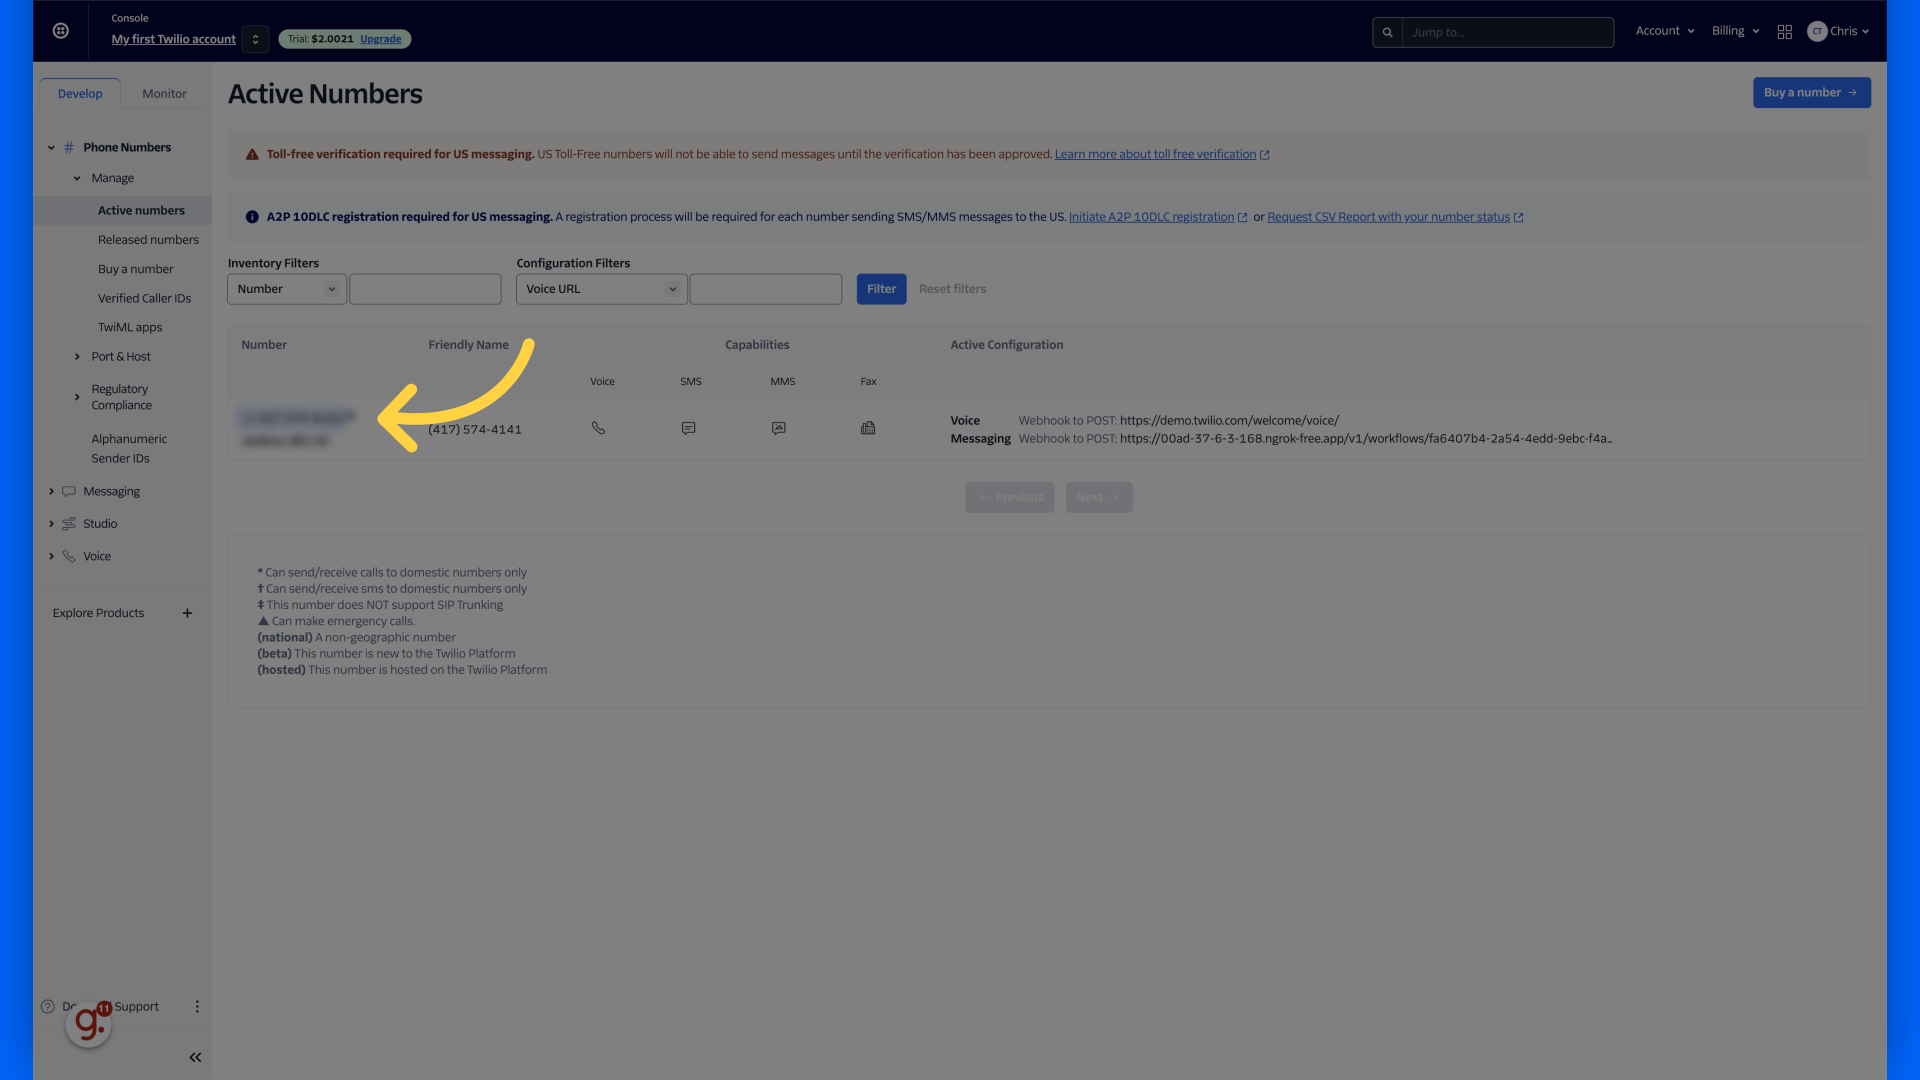
12. Click here
Click your number
13. Click "Configure"
Access the configuration settings.

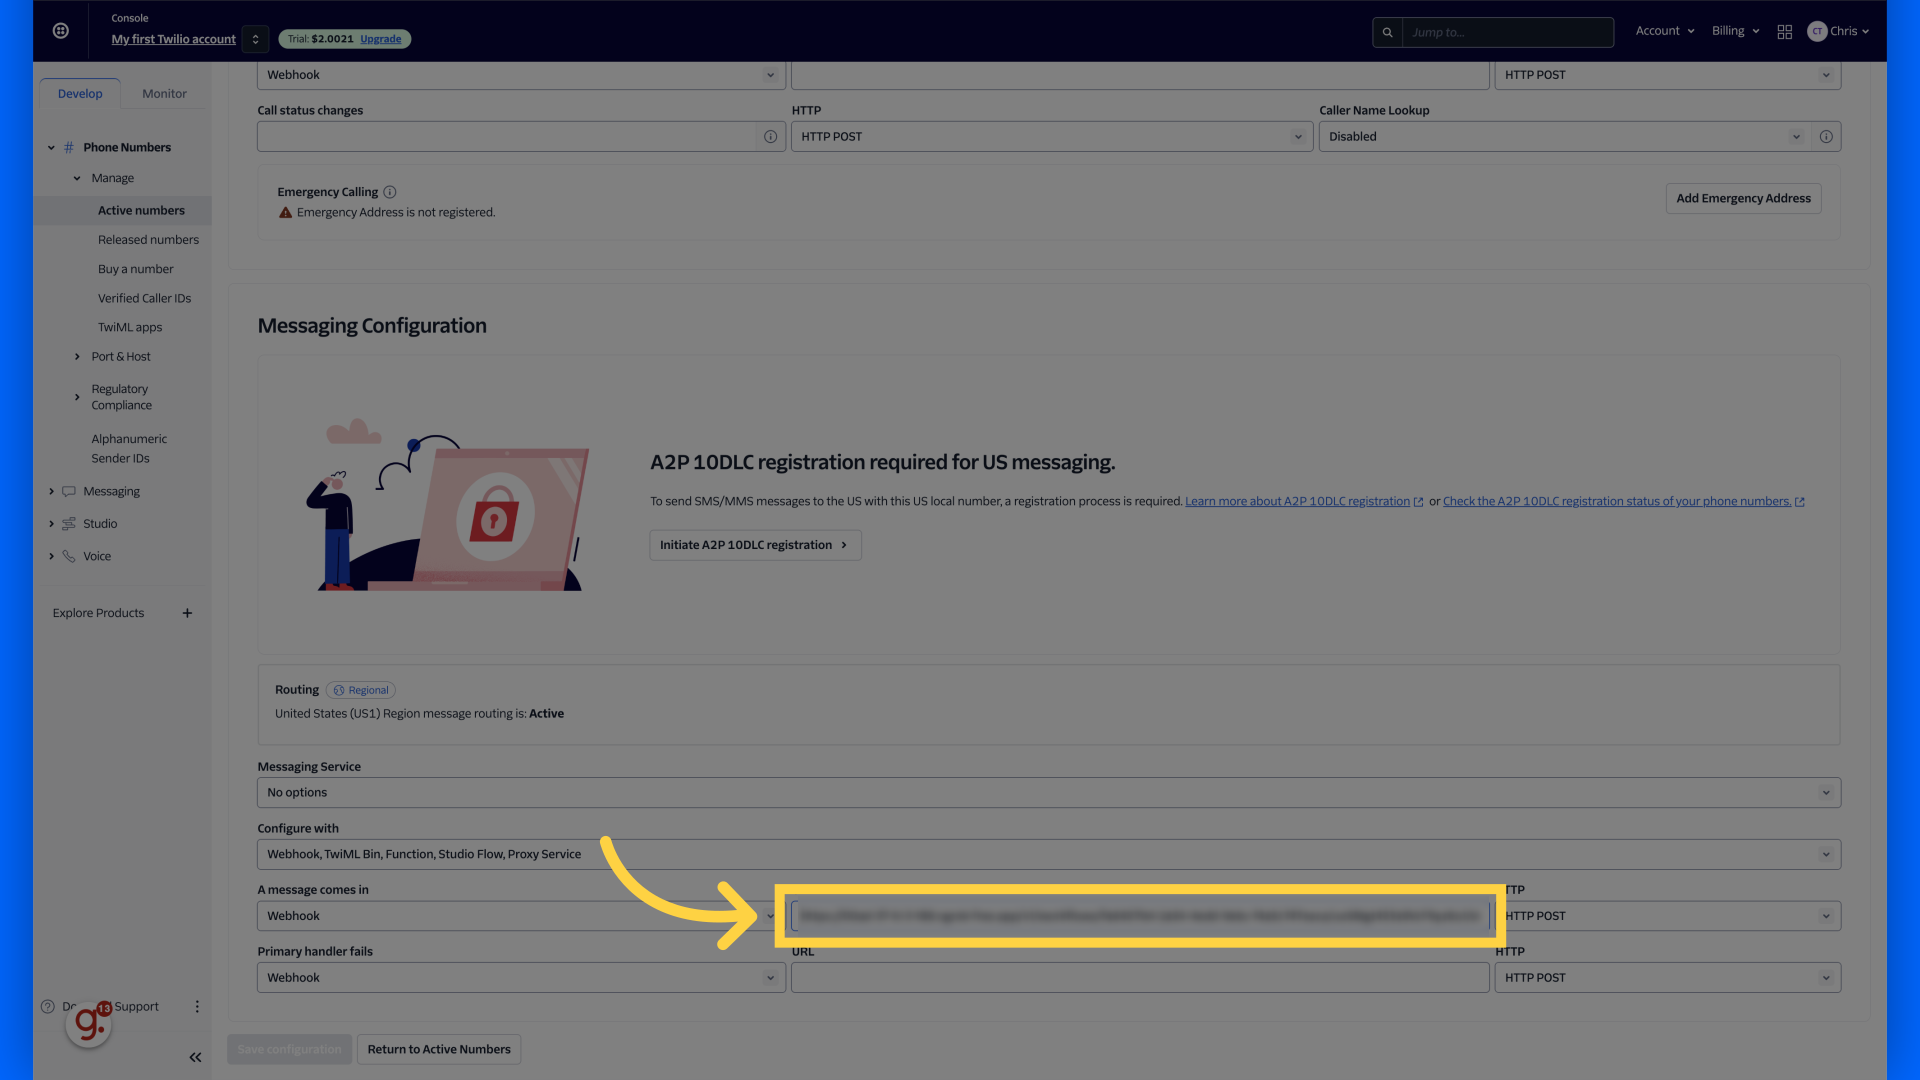
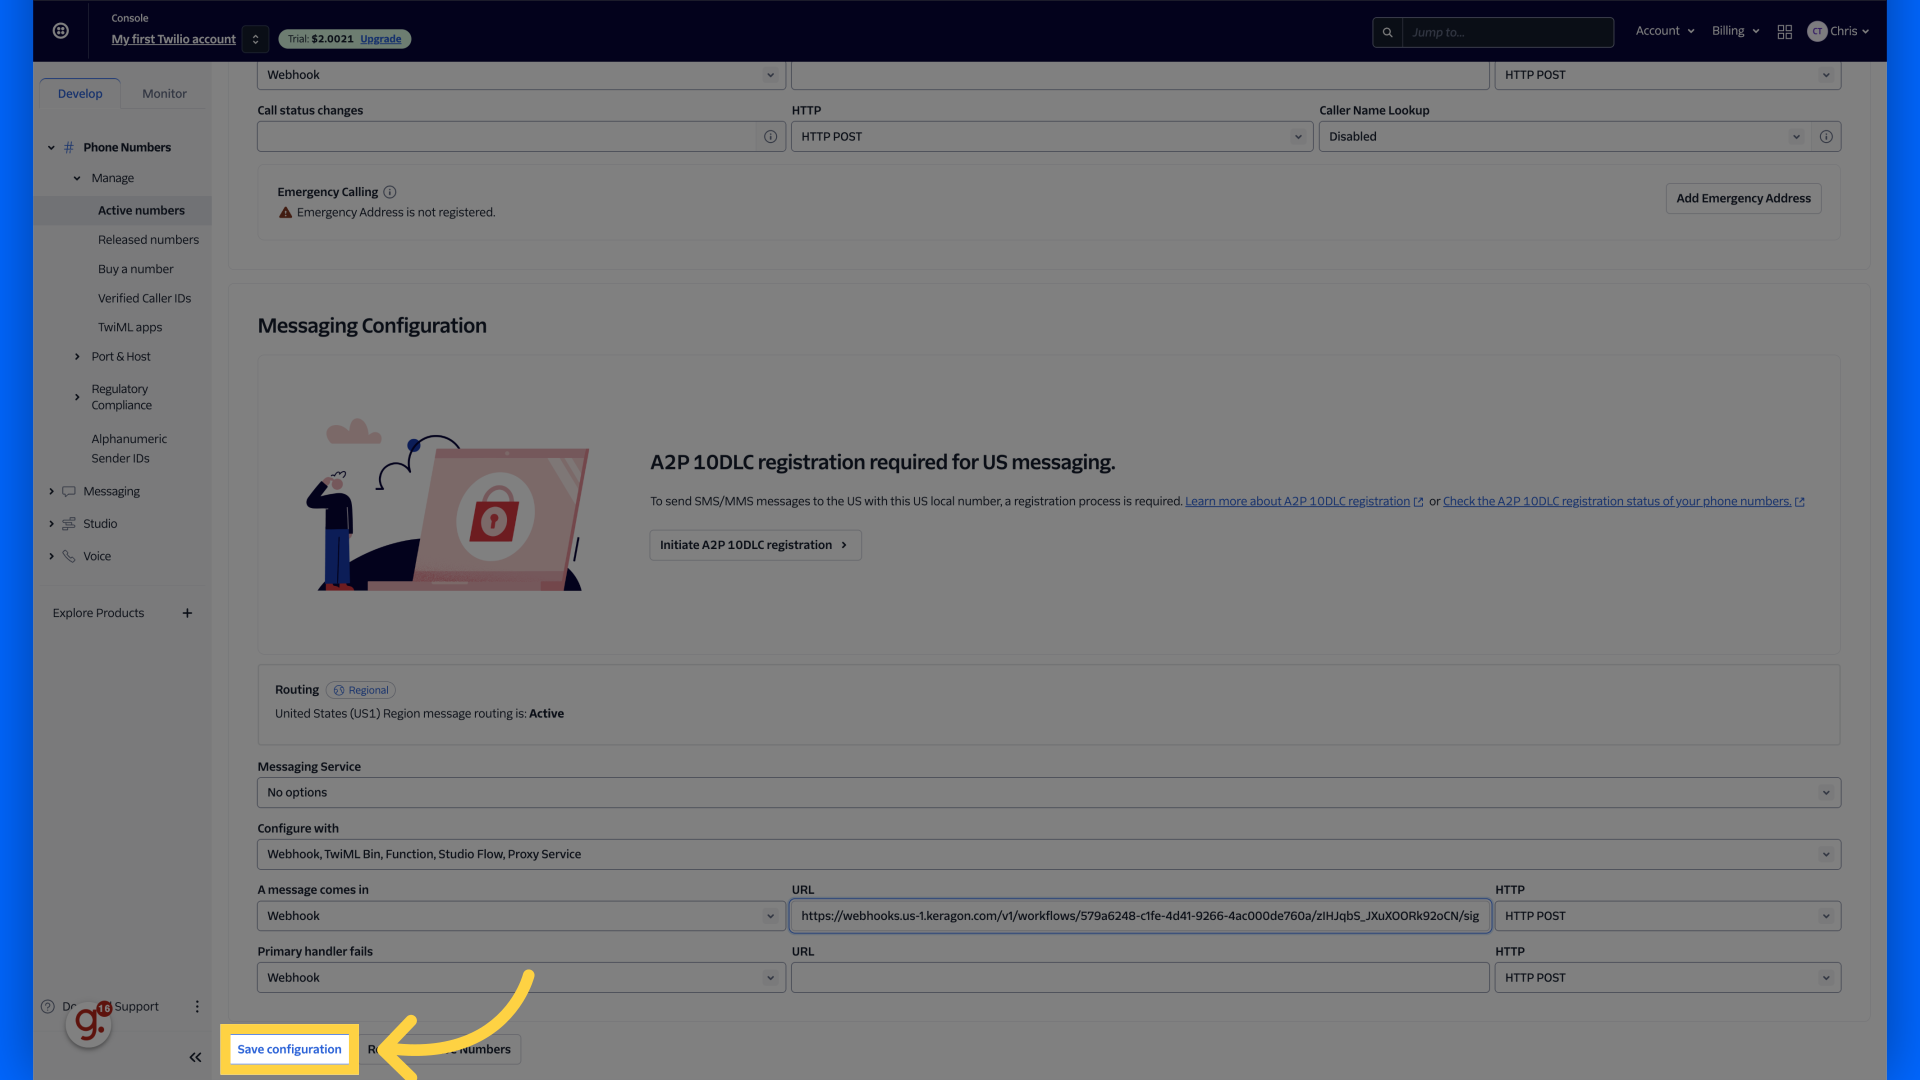
14. Paste copied URL under "Messaging Configuration"
Paste copied URL
15. Click "Save configuration"
Save the configuration settings.
This guide covered setting up Keragon webhook in Twilio, including adding triggers.